When we say simple – we mean simple… Provided you have a Kitchen-Aid or comparable stand mixer, a marble, glass or comparable wooden work surface, and a little experience baking bread. A pure novice could probably pull this off – but might have to ask a few questions… Which is alright. We were all new at some point..
Take 4 1/2 cups of flour, the leaves from (2) 8-inch sprigs of fresh rosemary, rough chopped, 2 teaspoons of Kosher salt and 2 teaspoons of Fleischmann’s Bread Machine Yeast (works fast and keeps on rising through a lot of strange conditions and temperatures – which makes it easier for novice bread makers)… Mix them all in a bowl and begin to add between 2 1/2 to 3 cups of spring water to the mix slowly, as it begins to come together. Add only enough water to allow the mix to pull away from the bowl cleanly and not stick to the bowl or climb up the dough hook.

If the dough becomes too wet simply add a little more flower by the pinch until the dough begins to pull away from the bowl and the hook. The easiest way to not screw it up in the first place is to add the water little by little and allow it to soak into the flour a bit before adding any more – up to the desired consistency. There is no race to add the water. Just add it slowly up to 2 1/2 cups and watch what happens before adding any more. If the mixer begins to grind and moan and bog down, it means the dough is too dry. Add any more than 3 cups and you’ve probably overdone it.
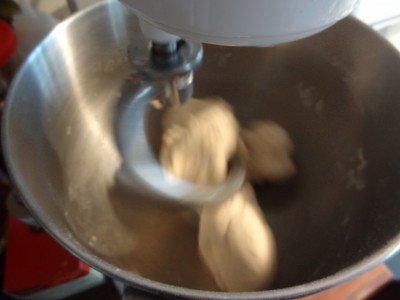
Once the dough is mixing freely in the mixer – let it run for 5 to 7 minutes and then turn it out into a large glass or ceramic bowl. Steel will work – but I’m of the school that yeast and metal bowls don’t really like each other that much – and that more consistent results come from using something other than metal for the initial or secondary rise.
Cover the bowl tightly with cling wrap and allow 3 to 5 hours for the initial rise. Once the dough has risen – most likely sticking to the cling wrap – don’t worry about it – just separate the two and discard the cling wrap. With the dough still in the bowl – wet your hands lightly with water and punch the dough down with your fingertips – being sure to punch as many indentations into it as possible and get as much of the air out as you can. Also be sure to scrape down the sides of the bowl and reincorporate any little bits that got stranded on the sides of the bowl.
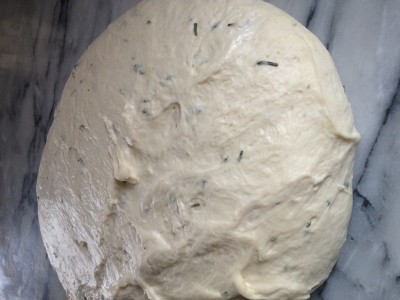
Re-wrap the bowl and place in the refrigerator over night. The next day – turn the dough out onto a marble work surface and cover with a large bowl to warm up, become active again and in essence “proof” for about 2 hours. We use a large commercial stainless steel salad bowl as a cover – similar to a cloche one might use to cover a roast. It keeps the dough from crusting over and allows it to rise freely in all directions.

After about 2 hours – or the dough has become fully active again and has doubled in size – cut the dough in half – sprinkle a little flour on your work surface and 1 at a time – roll it out long and fold it over no less then three times (I might have to make a video to demonstrate this this), pounding the dough out with your fist if you have to. The idea is to fold the dough and create some surface tension. Once the dough has been folded and has begun to firm up a bit, take it and roll each loaf out with your hands one final time to the desired length and size if you want long bread – or you can simply make a ball out of it and allow it to rise as a round loaf.
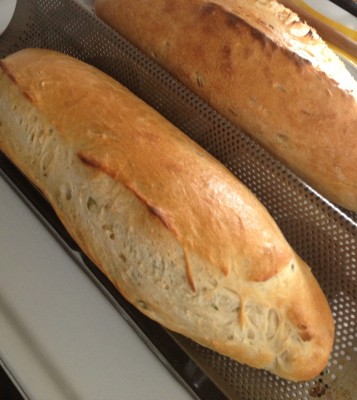
In this case – we were making a longer french style bread – so we rolled it long and then placed it in a baguette tray to rise again. One of the nice things about the baguette tray is that you don’t have to handle the dough any more. Just pick it up and toss it into the oven when it’s ready.
Cover the rolled dough loosely with plastic wrap and allow it to rise again – usually taking about an hour. More active dough will rise in 20 to 30 minutes.
Once the dough has risen to the desired size – take a very sharp knife or razor blade and make an incision about a half inch deep down the length of the bread. Place it into a pre-heated 440 degree oven for 25 minutes – using a spray bottle to create some oven humidity every 2 minutes for the first 10 minutes. It’s ok to spray directly onto the dough if you want, which will help develop a nice crust. After the first 12 minutes, reach in and rotate the dough 180 degrees to bring the back forward and push the front to the rear of the oven. This is for even browning.
After 25 minutes or the desired color is reached – pull the bread – allow to cool. Serve…
Get ready to make more. It will be gone before you know it.
– The Chef


Leave a Reply